
How to Display a Food Menu on a TV (The Simple, Free Way)
Learn how to design and display your own digital food menu on any TV using just a USB drive. Perfect for restaurants and cafes on a budget.
When you decide to put your food menu on a TV, it’s easy to think you need to hire a designer or a tech guy to get it looking right.
But the annoying part about hiring someone else is that you lose control. If you just want to change a price, fix a quick typo, or add a weekend special, you’re stuck waiting on them to do it for you.
The good news is, it’s actually way easier than it looks. If you have a TV with a USB port, you can do this yourself for free. Let’s walk through how to design your menu and get it up on the screen in minutes, without needing complex digital signage software or technical expertise.
What You’ll Need
Before we start, make sure you have these three things ready:
- A TV with a USB Port (Look at the back or side of your screen).
- A USB Flash Drive (Even a small one will work perfectly).
- A Computer to create your design.
Step 1: Designing Your Custom Menu
Today’s online design tools make this process stress-free. Thousands of clean, beautiful, free templates await. You do not need design skills to start creating a professional restaurant menu display.
Choose Your Orientation
Before you click anything, look at how your TV is mounted on the wall. This is the most important step!
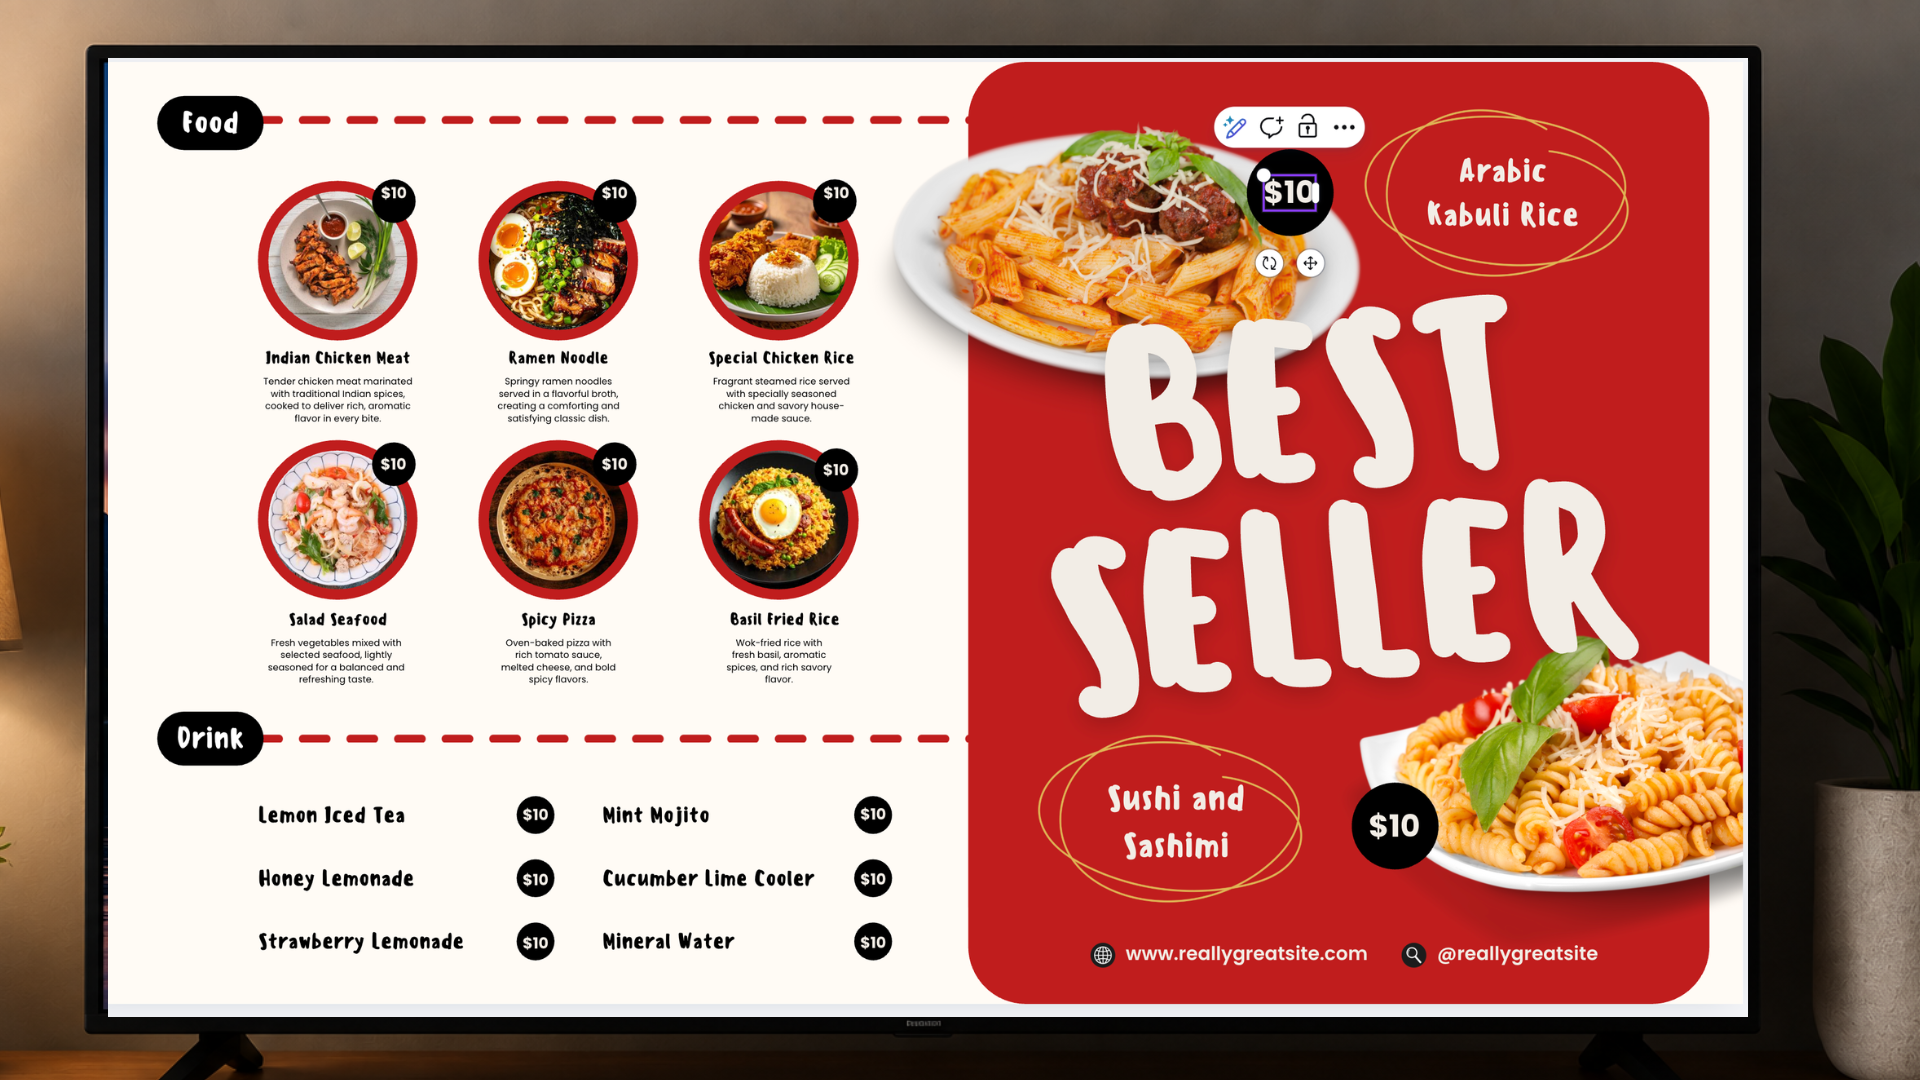
- Landscape (Horizontal): The classic, wide TV setup. Best for showing multiple columns of food items.
- Portrait (Vertical): The TV is turned sideways, standing tall. Best for long, continuous lists.

Landscape
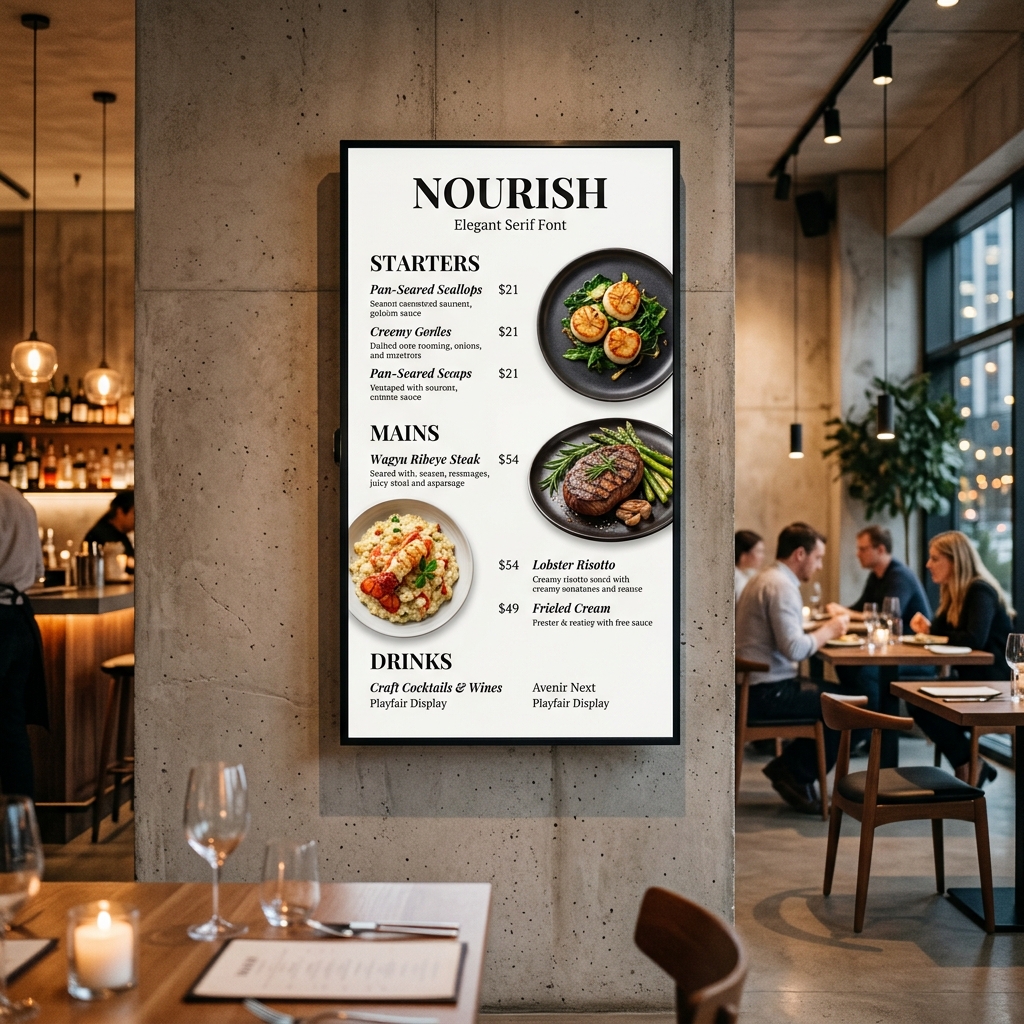
Portrait
Set the Perfect Canvas Size
Once you know your layout, create a “Custom Size” in your design tool. Use these exact pixel dimensions for a sharp, high-definition screen:
- For Landscape TVs: Width: 1920, Height: 1080
- For Portrait TVs: Width: 1080, Height: 1920

These exact numbers guarantee a perfect fit. No black bars. No blurry text. Just a clean, full-screen menu.
Best Practices for Digital Menu Design
To ensure your food menu list is easy to read for customers standing across the counter:
- Typography: Use large, bold fonts for your item names. Avoid thin, curly cursive fonts as they blur on digital screens.
- Contrast: Maintain high contrast. A dark background with white text, or a white background with dark text, works best.
- Limit Items: Don’t cram your entire 5-page menu onto one screen. Create multiple slides or stick to top-sellers.
Customize Your Template
- In the search bar of your design tool, simply type “Food Menu”.
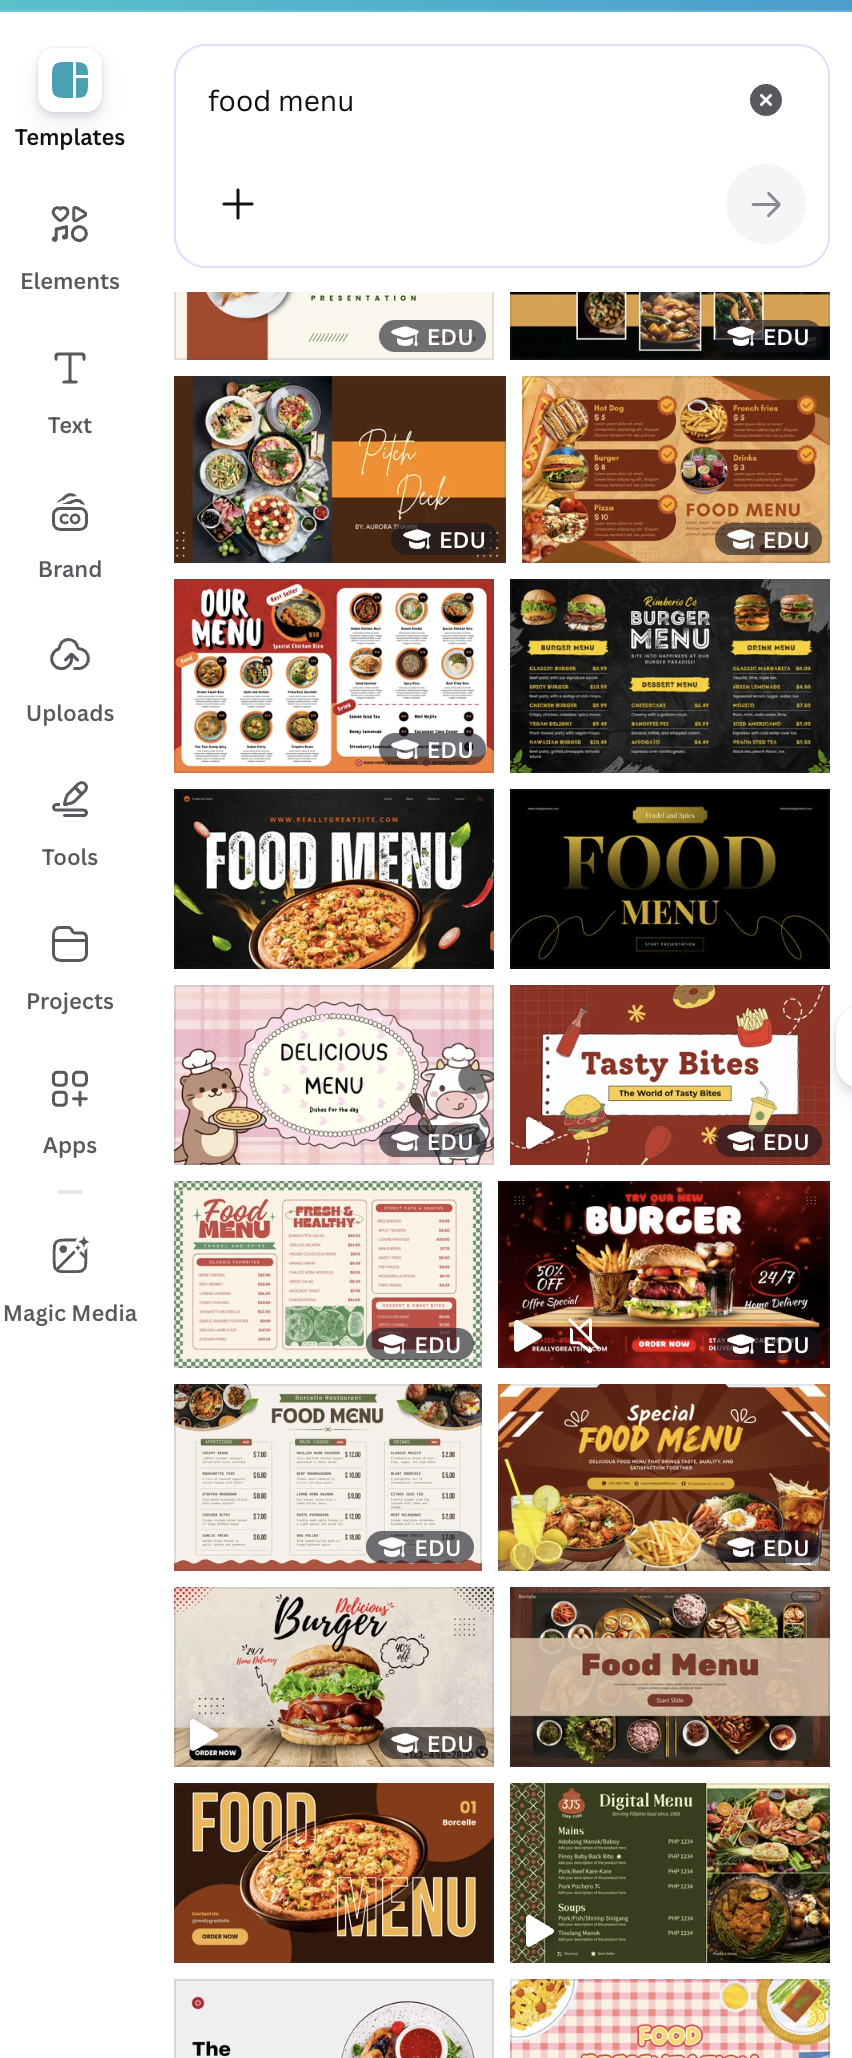
- Scroll through the templates and click on one that matches the vibe of your space.
- Swap out the placeholder text with your actual menu items and prices. You can easily drag and drop your own food photos right onto the screen.

Download a Crisp Copy
Always choose PNG over JPEG for menus. PNG keeps text edges sharp. Customers can easily read your prices from across the room.
- Choose PNG as your file type.

Always choose PNG over JPEG for menus. PNG keeps the edges of your text perfectly sharp, making it much easier for customers to read your prices from across the room.
Step 2: Displaying the Menu on Your TV
Now that your menu image is ready, it’s time for the satisfying part: putting it on the screen.
Copy to Your Flash Drive
Take a standard USB thumb drive and plug it into your computer. Drag your newly downloaded PNG menu file and drop it directly onto the drive. Once it copies over, safely eject it.
Plug and Play
- Walk over to your TV and gently insert the USB drive into the port on the back or side.
- Pick up your TV remote and press the Source or Input button.
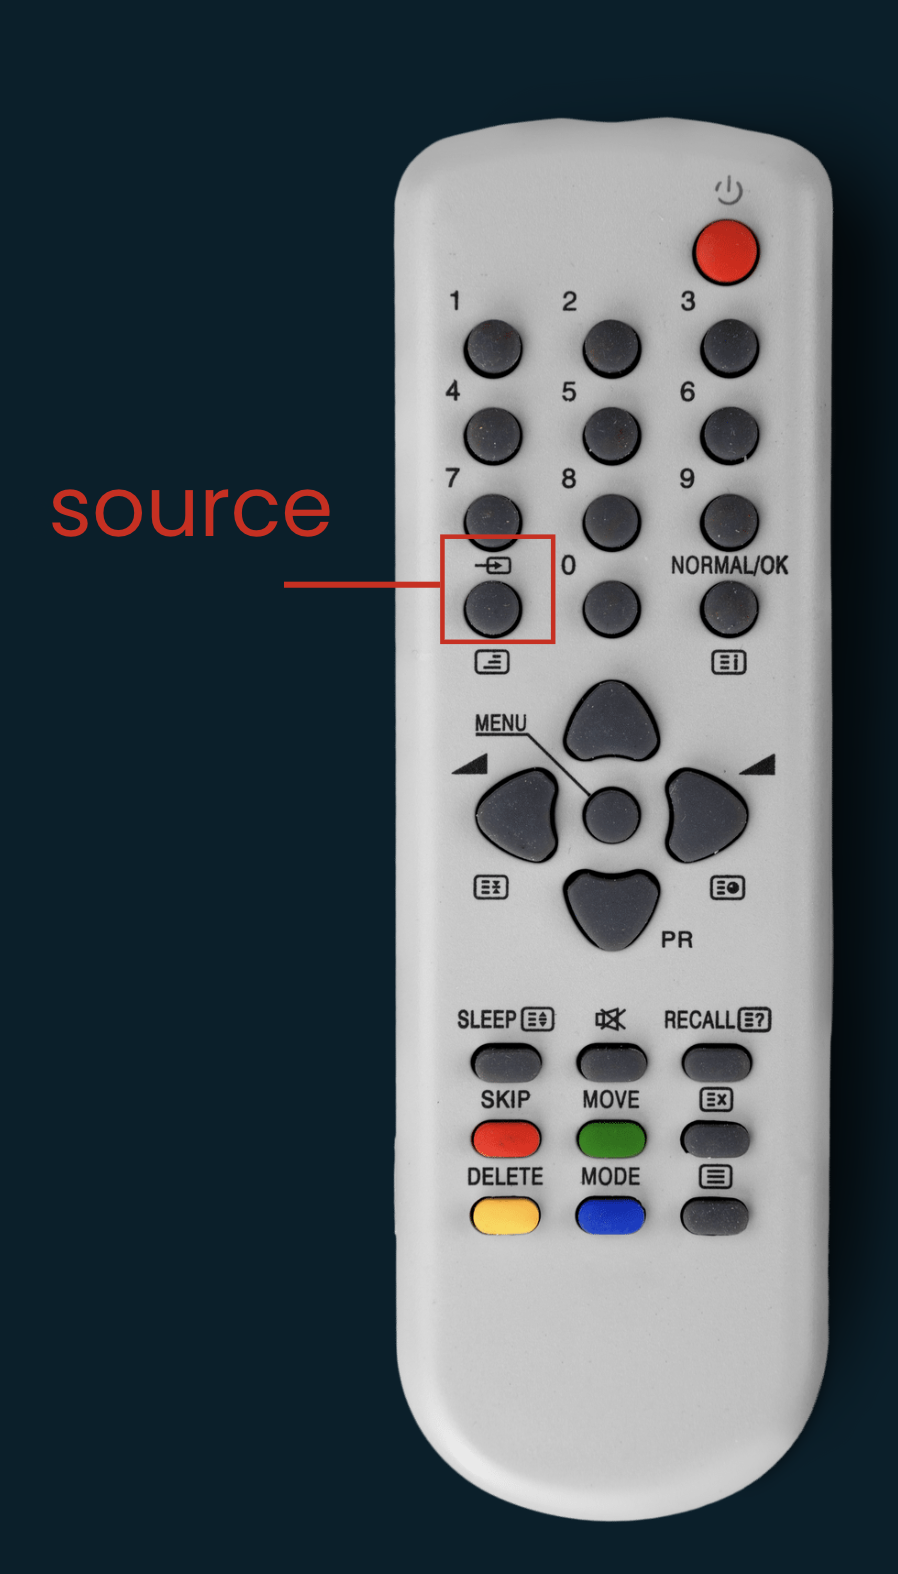
- Scroll through the options and select USB.

Open the Menu
The TV will open up the folders on your USB drive. Click on your food menu image to preview it. Some TVs allow you to set an image to “Loop” or display endlessly. Make sure to select that option so your screen doesn’t time out.

And just like that, your screen fills up with a beautiful, custom-made digital menu. There are no black borders or stretched text. You just get a crisp, clean display.
Taking It to the Next Level: USB vs Digital Signage Software
Whenever a price changes, you simply update the text in your design tool, save it to the flash drive, and plug it back in. You are completely in control.
A USB drive is a great, zero-cost way to launch your first digital display. It gives you full control over your menu from day one. It gives you total independence and lets you manage your restaurant on your own terms.
When to Upgrade?
USB drives work for a start. But if you change your menu often, or have multiple screens, manual updates become a hassle. Pulling the USB out, walking to a computer, updating it, and plugging it back in takes away from your time with customers.
Upgrade to dedicated digital signage software when you need to:
- Update menus instantly from your laptop without touching the TV.
- Manage multiple screens across your restaurant simultaneously.
- Schedule screens to switch automatically from breakfast to lunch menus.
Signage software handles the screen management for you, so you can focus entirely on your customers. Check out our guide on How to Automate and Schedule Content Across Multiple TVs.
Looking for simple, affordable digital signage?
Manage your screens effortlessly with Yugna. Have questions about your setup? Book a quick demo with us.